Preparation: What You Need Before Laying Tile
How Level Floor For Tile: Are you ready to take on the challenge of laying tile? Before you get started, it’s important to make sure you have all the necessary tools and materials on hand to ensure a successful project. At MA Flooring, we understand how intimidating it can be to prepare for a tile installation – but with the right guidance and preparation, it doesn’t have to be. we suggest you read the Floor Levelling Melbourne page for more details.
To get started, make sure you have the following items on hand before attempting to lay tile:
Tile: You’ll need to make sure you have the right size and shape of tile for your project. Consider how the tile will look and how it will fit in with the overall design of your space. If you’re unsure about which tile to choose, feel free to ask for advice from one of our experts at MA Flooring.
Mortar and Grout: Mortar and grout are essential components of any tile installation and can help ensure your tile is laid properly. Make sure you have the right type of mortar and grout for your specific tile and project.
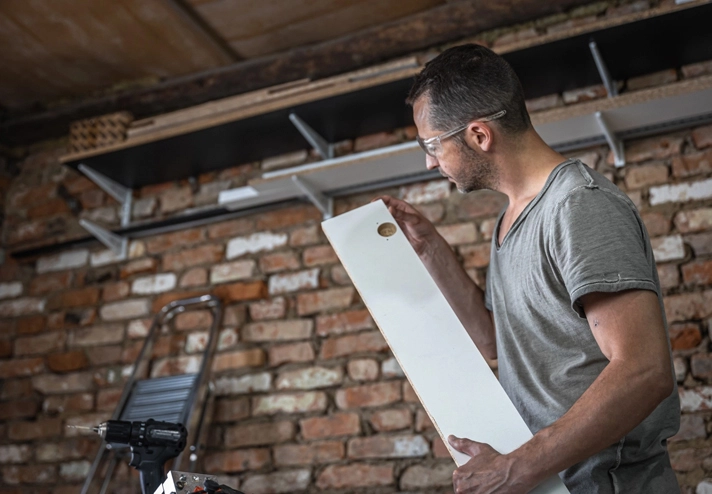
Tools: There are many tools you’ll need to lay tile and they can vary slightly depending on the type of tile you’re using. Common tools you might need include a level, trowel, sponge, and rubber mallet.
Safety Equipment: It’s important to take safety seriously when laying tile. Make sure to wear the right protective gear such as goggles, gloves, and a dust mask.
How Level Floor For Tile: Once you’ve gathered all the items you need, read through the instructions for your specific tile and project. Preparing for your tile installation is a key part of the process, and having all the right items on hand will help make it a success. If you have any questions about the process, our experts at MA Flooring are always available to offer advice.

Measuring and Marking the Floor
How Level Floor For Tile: Measuring and marking the floor is an important step in laying down a tile flooring. Whether you’re a DIYer or professional contractor, ensuring the floor is level is essential to the successful installation of your flooring. In this blog, we’ll discuss the various techniques used to measure and mark a floor for tile installation, and provide tips for getting the job done accurately and efficiently. we suggest you read the Engineered Timber Installation page for more details.
When it comes to measuring, there are two main methods to choose from: using a level or using a measuring tape. Using a level is the best method for ensuring the floor is level, as it takes into account any potential irregularities in the floor’s surface. To use a level, you’ll need to start at one end of the room and slowly move the level along the floor, making sure to check for any bumps or dips along the way. Once you’ve identified any irregularities, you can use the level to measure and mark the floor accordingly.
Alternatively, if you’re looking for a more economical option, you can use a measuring tape to measure and mark the floor. Before you start, it’s important to make sure the tape you’re using is long enough to reach across the entire room. You’ll then need to measure the floor in various locations, such as the walls, corners, and doorways, to ensure the floor is level. Once you have these measurements, you can use a pencil to mark the floor accordingly.
How Level Floor For Tile: In addition to measuring and marking the floor, you’ll also need to prepare the floor for tile installation. This includes cleaning and prepping the surface to remove any debris, dirt, or other contaminants that could otherwise interfere with the tile’s adherence to the floor. Additionally, you’ll want to make sure any existing cracks or other imperfections in the floor are filled in with a suitable patching material.
Regardless of whether you’re using a level or a measuring tape, measuring and marking the floor for tile installation is essential for creating a level and even surface for your tile. By taking the time to measure and mark the floor, you can ensure the tile is installed properly and will last for many years to come. If you’re looking for tips on how to level the floor for tile, be sure to consult a professional to get the job done right.

Leveling the Floor for Tile Installation
How Level Floor For Tile: Tile installation can be a difficult process, especially if the floor to be tiled is not level. A level floor is essential for a successful tile installation, as it will ensure that the tiles are laid correctly and evenly, without any obvious lumps, bumps or irregularities. we suggest you read the Vinyl Hybrid Installation page for more details.
Fortunately, there are a few techniques and methods you can use to level the floor for tile installation. The most common method is to use a special self-leveling compound, which is a lightweight and easy-to-use material that is spread over the surface and then allowed to dry. This works great on larger, more complex surfaces, and is the preferred method for professional installers.
For smaller areas, a more traditional method such as using a level and a screed board may be more appropriate. A screed board is a thin, flat piece of wood or metal that is placed along the surface, and a level is then used to ensure that it is perfectly level. This method is simple and takes less time, but it can be more labor-intensive depending on the area to be leveled.
How Level Floor For Tile: In some cases, it may be necessary to use shims or wedges to level the floor. These are thin pieces of wood or plastic that are placed underneath the surface to raise or lower it to the desired level. This method is best used in areas where the floor is not completely level, as it ensures that the area will be level once the tiles are installed (Carpet tiles).
No matter which method you use to level the floor for tile installation, it’s important to take your time and be precise. It’s much better to take the time to get the floor perfectly level before beginning the installation, than to rush and end up with an uneven surface.
Finally, it’s important to remember that most tile installations require an additional layer of protection, such as a moisture barrier or sealant, to ensure that the tiles remain in good condition. When in doubt, always consult with a professional installer or manufacturer of the tile you are installing to ensure that the proper protection is applied.
Leveling the floor for tile installation is an important part of any tile project, and one that should not be overlooked. With the right tools and techniques, you can ensure that your tile installation is successful and that your tiles remain in excellent condition for years to come.

Choosing the Right Tiling Materials
How Level Floor For Tile: When it comes to interior design, tiling is a popular choice, as it adds a touch of style and sophistication to any room. But when it comes to choosing the right tiling materials, there are many factors to consider. Not only should you consider the look and feel of the tiles, but also the durability, cost, and installation process. we suggest you read the Laminate Installation page for more details.
When it comes to selecting the right tiling materials, there are a few things to consider. First, you’ll need to decide on the type of tile you want. Porcelain, ceramic, and stone are all popular choices. Porcelain is a hard, durable tile that is often used for floors, walls, and countertops. Ceramic is a softer tile that is often used for accents and designs. Lastly, stone is a natural material that is often used for accents, backsplashes, and shower walls.
Next, you’ll need to consider the cost of the tile. Porcelain and ceramic tiles tend to be more expensive than stone, so it’s important to weigh your budget against the cost of the tile. Additionally, you’ll want to consider the installation process. Depending on the type of tile you choose, installation may require specialized tools and knowledge.
How Level Floor For Tile: Finally, you’ll want to think about the look and feel of the tiles. Do you want a classic look or something more modern? Do you want a glossy or matte finish? Knowing the answers to these questions will help you narrow down your choices.
Choosing the right tiling materials can be a daunting task. But by considering the type of tile, cost, installation process, and look and feel, you can make an informed decision that suits your needs. With the right tile, you can upgrade any room and make it look great for years to come.

Applying Mortar and Setting Tiles
How Level Floor For Tile: Applying mortar and setting tiles is a relatively simple process that can make a big difference in the look of a room. Whether you are working with ceramic, porcelain, stone, or mosaic tiles, the process is the same. Here’s a step-by-step guide on applying mortar and setting tiles: we suggest you read the Carpet supply and installation page for more details.
1. Preparing the Area: The first step in applying mortar and setting tiles is to prepare the area. This includes cleaning the area, removing any existing tile, and ensuring that the walls and floors are in good condition.
2. Measuring and Marking: To ensure that the tiles are placed in the correct position, use a tape measure to measure the area and mark it with a pencil.
3. Applying the Mortar: To apply the mortar, you’ll need a bucket and a trowel. Mix the mortar according to the manufacturer’s instructions, then use the trowel to spread it evenly over the area.
4. Setting the Tiles: Once the mortar is applied, it’s time to set the tiles. Place the tiles in the desired position and press them into the mortar.
5. Grouting: To finish off the project, you’ll need to grout the tiles. Use a grout float to spread the grout over the tiles and press it firmly into the grout lines.
By following these steps, you can successfully apply mortar and set tiles in any room. Not only will you have a beautiful and professional-looking finish, but you’ll also have the satisfaction of knowing you did it yourself. Applying mortar and setting tiles is a great way to spruce up any room and create a unique look.

Finishing Up: Sealing, Grouting, and Cleaning
How Level Floor For Tile: Finishing up any tiling project is an important step to ensure a long-lasting and beautiful floor. Sealing, grouting and cleaning are essential for achieving the highest quality result. Sealing the tile protects it from any potential water damage, grouting provides a strong bond between the tiles and the surface, and cleaning keeps the tiles looking spotless. If you’re looking to get the most out of your tiling job, it’s important to understand how to properly finish up with these three steps.
To start, you must ensure that the surface is level before you begin tiling. This is an important step as it helps to ensure that the tiles are evenly set and that there is no risk of any gaps between the tiles. Before you begin laying the tile, check the surface for any uneven spots and use a spirit level to make adjustments. If the surface is uneven, you can use a self-levelling compound to create a level surface.
How Level Floor For Tile: Once the surface of the floor is level, it’s time to seal it. Sealing the floor before you start tiling is essential for protecting it from any water damage. It also helps to keep the tiles from shifting, which can cause gaps or other issues. When it comes to sealing the floor, you have a few different options. Acrylic sealers can be used to protect the surface without changing the look, while polyurethane sealers offer more of a glossy, shiny finish.
Once the floor is sealed, it’s time to grout the tile. Grouting is essential for creating a strong bond between the tiles and the surface, and it also helps to create an attractive finish. To properly grout the tile, start by mixing a small amount of grout with water in a bucket. Use a rubber grout float to spread the grout over the tiles, and then use a wet sponge to wipe away the excess and create a smooth finish.
Finally, cleaning the tiles is an important step to keep the floor looking spotless. To effectively clean the tiles, use a mild detergent and warm water to mop the floor. Be sure to rinse the floor after mopping to get rid of any soapy residue. After cleaning, apply a tile sealer to help protect the tile against dirt and dust.
How Level Floor For Tile: By following these steps, you can ensure a beautiful and long-lasting tiled floor. Sealing, grouting, and cleaning are all integral parts of finishing up any tiling project, and they will help you get the most out of your project. So, take the time to properly finish up your tiling job and level your floor for tile to get the best results.